
Table of Contents
What is a Dell docking station?
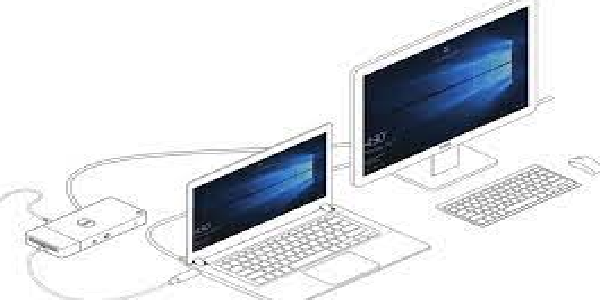
How to set up a docking station for dell. A Dell docking station is a great way to keep your electronics organized and accessible. With a docking station, you can easily connect your laptop to the TV, monitor, and other peripherals. You can also use a docking station to charge your laptop or to transfer files between your computer and external hard drive.
Dell docking stations are a great way to increase your productivity at home or in the office. They come with a wide variety of ports and features, so you can connect your laptop to any device you need. Plus, they’re always reliable and durable, so you can rest assured that your data is always safe.
What port do you use to connect a laptop to a docking station?
Docking stations are great for keeping your laptop connected while you work, but they can be a bit of a hassle to set up. You need to find a port that your laptop can connect to, and then you need to find a docking station that can connect to that port.
There are a few different ports that you can use to connect a laptop to a docking station. The most common port is the USB port, but you can also connect a laptop to a port on the back of a docking station using an HDMI cable or a port on the front of a docking station using a USB cable.
It’s important to choose a port that is compatible with your laptop. Not all laptops have the same ports, and not all docking stations have the same ports. Make sure to check the specifications for your laptop and for the docking station before you buy it.
Once you have your laptop and docking station set up, you’re ready to start working. Just connect your laptop to the docking station and start working.
How to Connect a Docking Station With a Dell Laptop?
If you’re like most people, you use your computer for work, personal use, and entertainment. You might use your laptop to watch a movie or work on a project at home, or take it to a coffee shop to catch up on your email. But, if you’re like most people, you probably don’t want to lug your laptop around with you when you’re not using it.
To connect your laptop to a docking station, you’ll first need to identify the ports on the docking station. Most docking stations have two USB ports, an HDMI port, and a headphone port. Some docking stations also have a Ethernet port and a 3.5 mm audio port.
Once you have identified the ports, you’ll need to connect your laptop to the docking station. You’ll need to connect your laptop’s AC adapter, the laptop’s power cord, and the docking station’s power cord. Then, you’ll need to connect your laptop’s Ethernet port to the docking station’s Ethernet port.
Finally, you’ll need to connect your laptop’s HDMI port to the docking station’s HDMI port, and connect your laptop’s headphone port to the docking station’s headphone port. You’re all set! Now, you can use your laptop as if it were connected to a desktop.
How to use a docking station with a Dell latop?
If you’re using a Dell Latop, then you’re probably using a docking station to keep it powered and connected. But what if you want to use the docking station with your Latop? Here’s how to do it.
First, make sure that you have the correct docking station for your Latop. If you have a Dell Latop with a video card built in, then you don’t need the docking station. If, however, you have a Dell Latop with a graphics card, you will need to use the docking station.
Next, plug your Latop into the docking station. Make sure that the power is connected to both the Latop and the docking station.
Now, open the docking station’s settings. On a Windows computer, this will be in the Control Panel. On a Mac, it will be in System Preferences.
In the docking station’s settings, you’ll want to find the option that says “Dock with this device”. You’ll also want to make sure that the option says “Enable this device”.
Why does the display go blank when I close the laptop lid?
There are a few things that can cause your laptop’s display to go blank when you close the lid. One of the most common causes is that the battery is low and the computer is trying to conserve power. If you are just about to finish up your work and you know that you have a full battery, try closing the lid with the power button still in the off position.
If that doesn’t work, your computer may have a power management feature that kicks in when the lid is closed. This feature can save power by turning off some of the computer’s components, like the display. If you’re having trouble getting your computer to turn off the display, you may need to restart it.